How To Make Candied Garlic And How You Can Use It

Learning how to preserve garlic is very simple and very practical because garlic loses some of its power and spiciness, but it preserves and even enhances its flavor. That is why I want to show you two ways to prepare them because if you know how to make candied garlic, you can use them in many recipes.

In addition, you can confit a good amount and store them in canning jars, ready for use when convenient. So you will never miss a clove of garlic for when you want to flavor a stew, or when you want to make, for example, some great garlic prawns.

Ingredients

1. Garlic head one or more if you want to make more quantity
2. Extra virgin olive oil200 ml

How to Make Candied Garlic

To make candied garlic, the first important aspect is that of the raw material. You must use good, fat, beautiful garlic, preferably the ones you know where they come from. If you use garlic that is already old or wrinkled, the result will not be the same so make sure they are quality garlic.

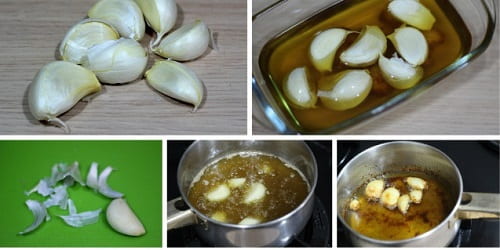
We are carefully separating the garlic cloves from the head, leaving them ready for use. The rest of the process to confit garlic can be done in two ways, either on fire or in the oven.

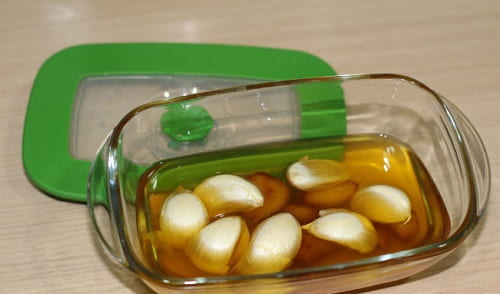
If we make them in the oven, we will put the garlic in a small glass or clay dish and add the olive oil to cover them. Then we bake at 150º for an hour. When you remove the skin, the garlic will be confit, being almost a paste, with a very subtle and delicate aroma.

If we confine them in a saucepan in the kitchen, what we will do is put the garlic cloves in the saucepan, cover them with oil and leave them to a minimum, stirring the garlic from time to time so that they are done everywhere. When I prepare them in a saucepan, I usually do it with peeled cloves, but it can also be done with unpeeled garlic.

We keep the oil at about 80º preventing it from boiling. After 40 minutes in which we will have turned the garlic from time to time, we will have the garlic turned into an exquisite product that we can keep in a jar with olive oil for weeks. And the olive oil that we have used, we strain it and we already have an oil flavored with garlic that can be very useful in other preparations.5 4 3 2 128 votes

How Can You Use Candied Garli

With either of these two techniques to confit garlic, you can always have garlic ready for use. The good news is that confit garlic is much softer than raw garlic although it maintains its aroma and flavor. Now that you know how to make garlic confit, you will see how they are excellent for gazpachos and other cold soups, as well as used to flavor mayonnaise and sauces.

How To Make Sweet Tea In The Sun

How To Make Sun Tea

Ah, tea in the sun. The nostalgic childhood drink that brings back warm memories of sitting on our back porch sipping tea and spitting out watermelon seeds.

It seems like all my teenage summer memories involve a large glass jug of this amber fire extinguisher. I remember drinking tea in the sun while helping my grandmother eat peas in her rocking chair. I remember drinking it at the pool parties on the 4th of July. I remember taking it at family gatherings on the beach.

In fact, I can never remember not having tea in the sun in summer. This makes me wonder why sun tea has become a lost art.

The other day, I dropped a green tea bag into my water bottle before meeting a friend for a workout. He noticed that my water bottle was shaking with a tea bag and questions began to arise.

How Do You Prepare Tea In The Sun?

Because you do that? (Because it tastes good and has no calories).

Was your water hot? (No.)

Is the tea really steeped in cold water? (Yes.)

How long does it take? (Not so long.)

And so.

My training partner was so in love with the idea of ​​putting a tea bag in cold water that it made me realize that maybe that’s why people don’t make tea in the sun anymore.

So today I want to share the basics of learning how to make tea in the sun.

Sun Tea 101

First, the tea leaves release their flavor in liquid form. Period.

It doesn’t matter if the water is hot, cold, or somewhere in between. When the liquid is hot, we call it soaking. If the liquid is cold, it is technically just plain old brew. Either way, it doesn’t really matter what you call it. When the tea leaves get wet, the flavor comes out.

The reason most people soak tea in hot water (in addition to liking hot beverages) is that the tea releases its flavor faster when the water is hot. A quick-release in a short period of time generally results in an intense flavor and deep color.

That is not to say that the same cannot happen in cold or warm water over a longer period of time.

The general idea of ​​making tea in the sun is to make a large quantity of iced tea for the summer without having to turn on the stove.

How To Make Tea In The Sun

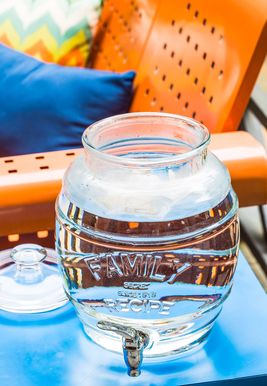
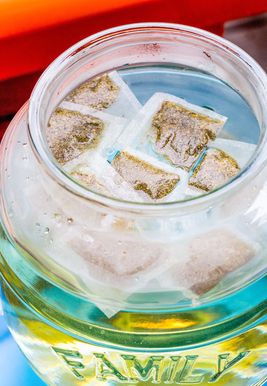
To make homemade sun tea, simply fill a large glass dispenser with water and add 8 tea bags per gallon, depending on the size of your container.

I poured 1 & frac12; gallons of water in my dispenser so I added 12 tea bags.

The type of tea you use is completely up to you. Traditional southern iced tea is usually made with some type of black tea blends, such as Lipton or Luzianne. But feel free to explore and get creative here. If there’s one thing I’ve learned from my mom about making tea, it’s that the best-iced teas often come from a random mix of whatever kinds of tea bags you have stashed in your pantry.

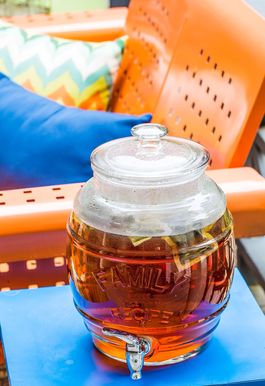
For example, green tea, hibiscus tea, and peach tea are mixed to make a wonderful fruity iced tea with a rich red color.

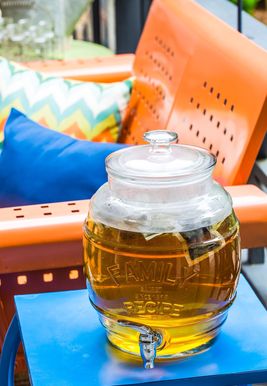
Once the tea bags are in the water, cover the dispenser and place it in the sun. The amount of time it will take for the tea to sit in the sun is based on several factors:

How hot is it outside?

What kind of tea are you using?

How big is your teapot?

How dark do you like your tea?

A general time frame is 2 to 3 hours of sunshine. I am known for bringing mine after only an hour on a very hot day.

Once the sunshine tea has the color and flavor you want, sweeten the tea if desired.

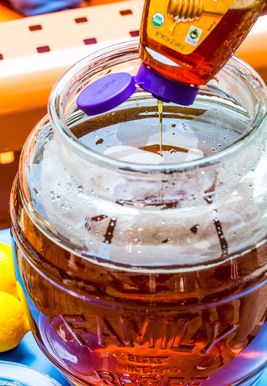
Rather than add the sugar and watch the granules settle to the bottom of the jar, I like to sweeten my sun tea with honey or agave. Stirs nice and smooth.

How much you use is completely up to you. Add & frac14; cup at a time and taste after stirring before adding more.

Lastly, if you like lemon or lime in your tea, go ahead and throw them in the dispenser. They will give the tea a slight citrus note and will also serve as a garnish.

That’s it!

Remind:

Add 8 tea bags per 1 gallon of water
Use any combination of tea bags you like
Sweeten with a liquid sweetener, if desired.
Garnish with citrus

You can do it! And hopefully, you will also try the teabag in the exercise water bottle hack. It’s a great way to encourage yourself to rehydrate!
This content is created and maintained by a third party and is imported to this page to help users provide their email addresses. You can find more information about this and similar content on piano.io Advertising – Continue reading below

Categories:

These Macaroni And Cheese Are Extra Creamy
Spring, spring, spring!
Serve Grilled Corn with Spicy Bacon Butter
Alex’s Wedding Is Really Coming Together
When Punks Take Pictures
Day 319: Lodge Update
Leaving this place
Fast Food & Snack Quiz: Answers & Winners!
The Best Artichoke and Spinach Sauce of All Time
These Cowhide Rugs Look Like Home In Every Room

How To Make Your Own Transfer Letters To Rub

With a few items that you may already have on hand around your house, you can make your own rubbing transfers to decorate candles, album pages, home decor projects, or art papers. This will be cheaper than buying a ready-made transfer and will give you the opportunity to customize them using your computer and printer, plus you won’t need to go to any store in search of the transfer you need for your project.

Open a document in the word processor and insert the image you want to make your transfer. Use a text box to move it around the document.

Mirror the text or images so that when you transfer it will be seen from the right side. This is necessary, especially with words. Some types of printers allow you to set mirroring preferences just before printing rather than on your document.

Make themes for your album pages using craft rub transfers.

Spray transparency with fine hairspray, covering it completely, but not dripping. Dry it with a hairdryer for about 20 to 45 seconds.

Insert the copier transparency into your printer and print the image using the highest image quality. Let the ink dry completely on a flat surface.

Spray a small layer of hairspray over the entire transparency, including the ink, and blow dry for 20 to 45 seconds.

Flip the transparency over your project and position the image where you want it to go. Rub the opposite side with a spoon to transfer the image. It may take a little practice to get it right.

How To Print Our Word Documents In Reverse Order

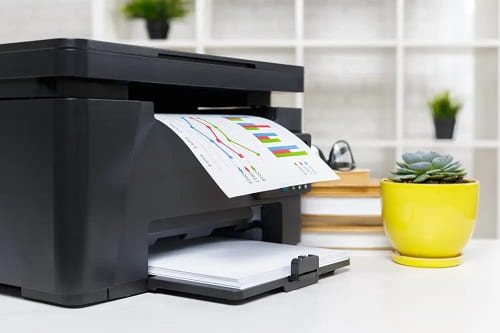
Surely we have ever gone to print a document that we have written in Word, with several pages and, by not paying attention when configuring the printer, by default all the pages have started to print from the first to the last, leaving all the pages of our document out of place and having to reorder them all, something that we could have avoided if we had configured our printer to print the document in reverse order.

When we print a document on our printer , it is usually printed from the first page to the last , the last page being on the top and all the reverse pages until the first, which will be the one at the bottom. We can configure the printer, from Word, to print from the last to the first so that, when we finish printing, the page we have on top is the first and our document is already ordered.

How to set the printer in Word to print in reverse order

To configure Word to always print in reverse order by default, all we have to do is open the Options panel and, in the Advanced section, find and mark the option “Print pages in reverse order.”

Once this option is activated, Word will force all printers to print the documents in reverse order by default so that, when the task is finished, we will have the pages sorted.

Printers allow us to configure the order of printing without depending on Word

If we do not want Word to take care of this task, or we want the pages to be printed equally in reverse order from other applications, we can also configure this option directly from the printer.

To do this, we simply have to open the properties of our printer (in each model it will change) and look for the corresponding option that allows us to reverse the order so that it is printed from the last page to the first.

How to print only one document in reverse order

In case we only want to apply this configuration to a specific document, instead of doing it from the configurations, both in Word and in our printer, we can also do it by manually indicating the order of the pages. To do this, in the printing section of Word, we can see a box in which it asks us the pages we want to print.

Here we will indicate that we want to print from the last to the first and that’s it. Word will automatically print it in that order, but no settings will be saved for the other documents.

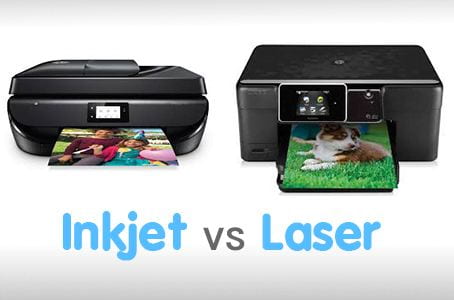
Laser Printer Or Ink. Which One Is Better To Buy In 2021?

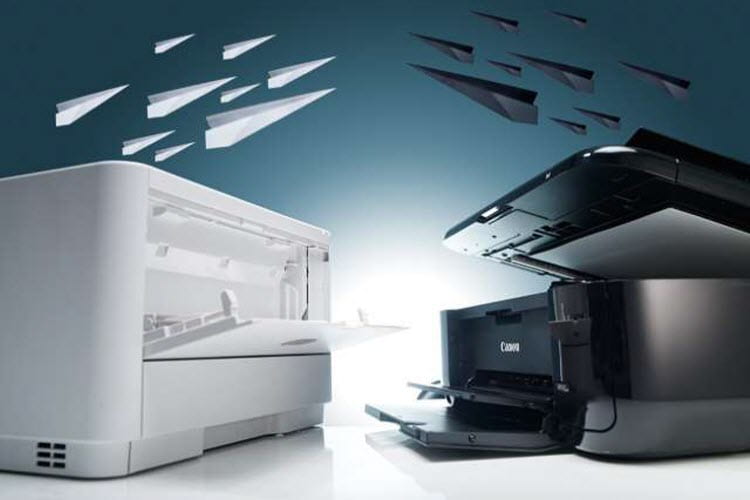
If you have come this far, it is because you want to buy one of these devices and you have the famous question of whether a laser or ink printer has arisen. We have you covered, because we comment in a summarized way (and also extensively) the pros and cons of each one, and for which situations it is recommended or another.

Before, if you wanted high-quality printing, affordable colors for home or professional use, you compared an ink one. If you needed something faster to handle office work, you bought a laser. Now it seems that they have been mixed. Even color lasers have come at affordable prices for home users, while office ink printers are being incorporated into larger businesses. So which one should you choose?

laser or in considering a laser or ink printer, to say that both have their advantages and disadvantages (logical), even if the best in internal technology is used in each model to overcome their limitations.

We are going to see in what aspect each one wins, depending on the use you want to give it, and at the end there will be a small conclusion and comparison of pros and cons. You can go to the direct end if you don’t want to see the extended answer, although we recommend it.

Which one can handle more workloads? Winner: laser

Looking at a laser or ink printer for the volume it can handle is easy. Lasers can handle massive workloads, with monthly cycles ranging from 2,000 to 20,000 pages, depending on the model. Few inks can handle similar numbers, since these range from 1,500 to 5,000 in the range of sheets.

But if you’re not going to print as much as a laser offers, you may want to consider an ink one, which will be more than adequate for most computers, offices, or small departments. But if you really have to print constantly and without rest, then the only thing you can count on is lasers.

Which is faster? Winner: tie

Popular wisdom will tell you that lasers are faster, but the reality is more complex. A few years ago, inks could produce 30 pages per minute in black and white and 10 sheets per minute in color, while lasers reached 40 in both. Today lasers can reach 70 in more professional models. Does this mean that the ink ones have been left behind? Far from it, a generation of office has emerged to revolutionize printheads and A4 prints. These can also reach the same speeds as lasers.

Which one is cheaper? Winner: ink

Again we go back to the popular beliefs, which say that among an ink or laser printer the latter are more expensive to buy but cheap in maintenance, while ink is cheap first but cost more in the long run.

You can always lower the cost of maintaining the ink, where I have seen that the prices were cheaper than in the other stores.

Some people also say that a toner cartridge for a laser will last you thousands of sheets, while the ink ones have to be replaced frequently.

See our comparison of cheap printers .

We know that in this regard it is not true. If you look at our laser and ink comparisons, you will be surprised how similar the prices are. For one thing, lasers are getting cheaper and cheaper, and the cheaper models come with starter cartridges that run out pretty quickly, although the standard ones will last their own thing. On toner alone, you can expect a cost per page of about 2 cents for black and white and 5-10 cents for color.

On the other hand, ink printers are trying to lower the cost per page, to the point that some models produce black and white pages of 1 cent for the color ones to 5. Meanwhile the extra-large cartridges are capable of producing more than 9,000 pages in black and 6,500 in color.

Still there are costs to consider. On the laser side, they bring us excellent results even on flat paper, so it is not necessary to buy any special type. In ink, office paper is no longer very expensive, and these models consume less power in operation than lasers. As a result, the price of using an ink printer is lower than that of a laser. In addition to this, it costs less to enter, so the winner of this section is the ink.

Which one prints with more quality? Winner: it depends
Lasers are still the champions when it comes to producing clear text and brilliant graphics. If you are printing with professional materials or printing your own marketing materials, then a good laser printer is surely the best option.

Still unsurprisingly, inks are not far behind either as they have improved dramatically in text output, to the point where the quality is as good for internal as it is for external use. Furthermore, inks tend to produce more natural results when printing photos, which is why most professionals use inks. An office ink printer won’t give you professional-quality photo prints, but it does give you good results.

Which is better for office and management? Winner: tie

Historically, lasers have been the center of attention in the workplace, and you will find that these have model lines with more exciting handling tools with advanced technologies. Examples can be set to Gigabit Ethernet or IPSec, not to mention upgrade options like expandable memory or security.

At the same time, the inks have been adapted to their laser cousins ​​to be competent in offices, and have incorporated these characteristics as well. We found that they even have features such as that they can also be a Wi-Fi printer, with a touch screen, or with support for the cloud, which allows printing from any device that is connected. While a laser can offer more management and safety tools, ink can also offer you today.

Laser printer or ink. Which one do I prefer?

I am sorry that you have come this far there is no single and serious answer. We can say that it depends on the use you want to give it. It is more an answer of budget, volume and type of tasks that you are going to give.

Lasers win in: high volumes, connectivity, extra tools, professional quality and the ability to be useful on large equipment.
Ink wins in: they are not far behind lasers in all of the above, they are cheaper both in initial purchase and maintenance.

Competition: laser against ink

Most still use ink for their routine printing tasks, but it is true that prices have been falling for lasers, at least in buying the machine, not so much in cost. If you have well analyzed the use you are giving to your printer or the one you want to give it, we will discuss some pros and cons of a laser or ink printer.

Interesting: The ink ones create a digital image by leaving small drops of ink on the paper, while the lasers produce them by scanning a laser light around photoreceptors.

Ink: good and bad things

Pros :

Good for photos and dense images. Inks do a better job of mixing colors than lasers.
They have a cheaper entry price and also maintenance since the cartridges are more affordable than laser toner.
Inks can print on many types of paper, including glossy, textured, and other materials.
Almost no warm-up time is needed before printing.
Ink cartridges can be refilled and reused, making them more environmentally friendly and pocket-friendly.
By size they tend to be smaller, lighter and easier to maintain than a laser.

Cons :

The ink is water-based, so prints are susceptible to liquid damage.
The cartridges need frequent cleaning, and although printers do it automatically, ink is wasted in doing it (in the best brand of printers we expand it).
If it is true that they are getting faster, they are still slower compared to lasers.
Being designed for lower volumes, tray capacities are lower, typically 50-100 sheets.

Laser: Good Things

Pros :

Lasers can print faster than ink. It doesn’t matter if you only print a few pages, but at high volumes users will notice the difference.
They produce perfectly accurate black text. If what you want to print is mostly text with an image, the laser is ideal. They also have better results with small fonts and fine lines than ink.
Much more prepared for high volumes.
Comparing laser printers or ink in not very complex documents, lasers win. Although they cost more, toner cartridges print more sheets relative to cost than ink cartridges, plus they don’t waste as much on content.

Cons :

Even if they work faster, they take longer to prepare.
Although toner may be somewhat cheaper in the long run, the initial cost is more expensive.
Toner leaks are a nightmare.
They cannot handle a variety of paper types such as ink. Anything that is sensitive to heat can be used with ink.
Home use laser printers can handle simple graphics, but good photos are challenging. If you want photos, buy an inkjet or a photo printer.
There are some compact lasers on the market, but they are generally larger and heavier than inks. If you want something to take from top to bottom, then a portable printer may be of interest .

Conclusion and final result. Assessment

Laser: print high volume, mostly text and in your office or home. Recommended comparisons:

Laser printers.
Color laser printers.
Laser multifunction.
Ink: print low volume, family photos, school or university projects and a tight budget. Recommended comparisons:

Multifunction printers .
Cheap printers.
Photo printers.
You see that it will depend on the functionality. If you do not have this clear aspect, I am afraid that we cannot help you in this regard. Even so, if it is still not clear to you and you want to know even more about printers and all the models that there are, we recommend that you look at our guide to printer types.

For any questions you may have so that we can look at your particular case and make a recommendation of models that you could buy either laser printer or ink, you can use the comments and questions section and we will answer you in a short time.
How To Print Documents From An Android Device

For a few years to print from home you don’t need a computer, you can print from your mobile device if you have a wireless printer.

Printers are now also an Android peripheral so you can print those jobs, documents, coupons, emails, web pages and photos comfortably from your mobile without having to turn on the computer. We tell you how to print step by step with your Android.

Install and Configure the Printer On Your Android

To print

If we have a wireless printer connected to our WiFi network we can install the printer on our Android device in a very simple way.

We will only have to go to Settings> Printing> Add service and install from Google Play the complement of the manufacturer of the model of our printer. Once your application is installed, all you have to do is enable the manufacturer’s printing service so that our device can locate the printers connected to our Wi-Fi network.

To print

If the printer is connected to the same Wi-Fi network as our mobile it will appear in the list of printers and by clicking on it we can configure it to configure its notifications, paper and print quality.

Open A Document, Mail or Image and Print

To print

Once our Android device has detected the printer, we can open a document, email or image from our favorite application and look for the Print option that is usually in the application’s options menu.

If the print option does not appear, we will have to use the Share option and search the printer option among the list of applications. This is the option that we will have to use to print in Chrome.
Adjust the Print

To print

When we click on the print we will jump to the Print dialog box that shows us the preview of the file and allows us to adjust the printing, such as the pages to be printed, if we want to print in black and white or in color, the size of the page, the orientation, the quality and more options that will vary depending on our printer. Once everything is configured, we have to press the print button so that the printer begins to work.

To print

Option to unmark certain pages from printing

To print

Print Queue and Errors

To print

Our Android device will notify us with its notifications of which files are being printed and the possible problems that may arise, such as no paper, little ink or a paper jam. In Settings> Printing we will see the print queue in case there are files pending or in the process of printing.

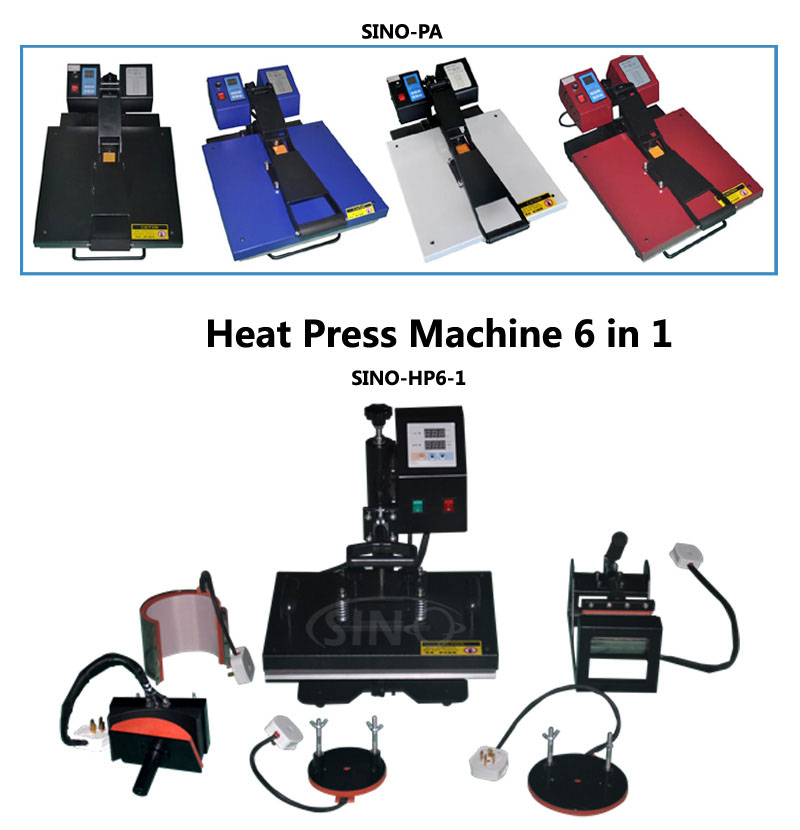
How To Use The Heat Press Machine

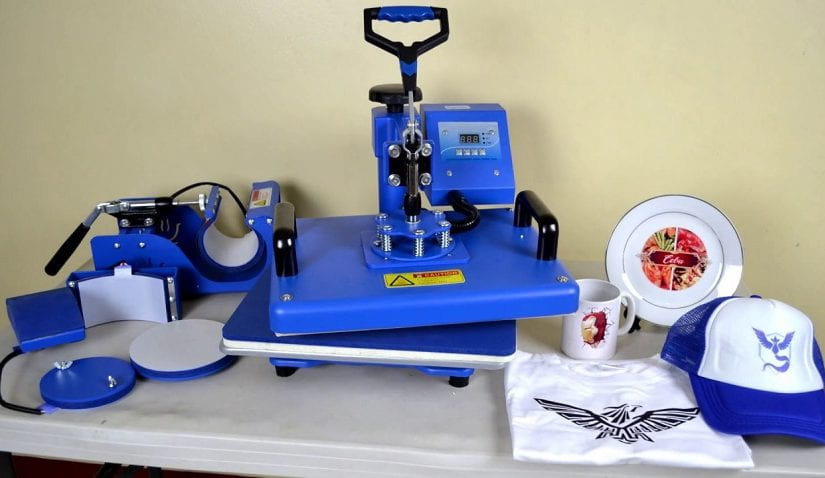
Heat press machines can print a wide range of surfaces, including flat heat transfer, as well as curved heat transfer for mugs, plates, and hats.

Features:
the color pattern is formed at the same time, no need to color
Simple operation, exquisite printing, low production cost;
The product has low loss, high added value, and strong process decoration. High hiding power and strong adhesion;
It meets the green printing standards and has no environmental pollution.

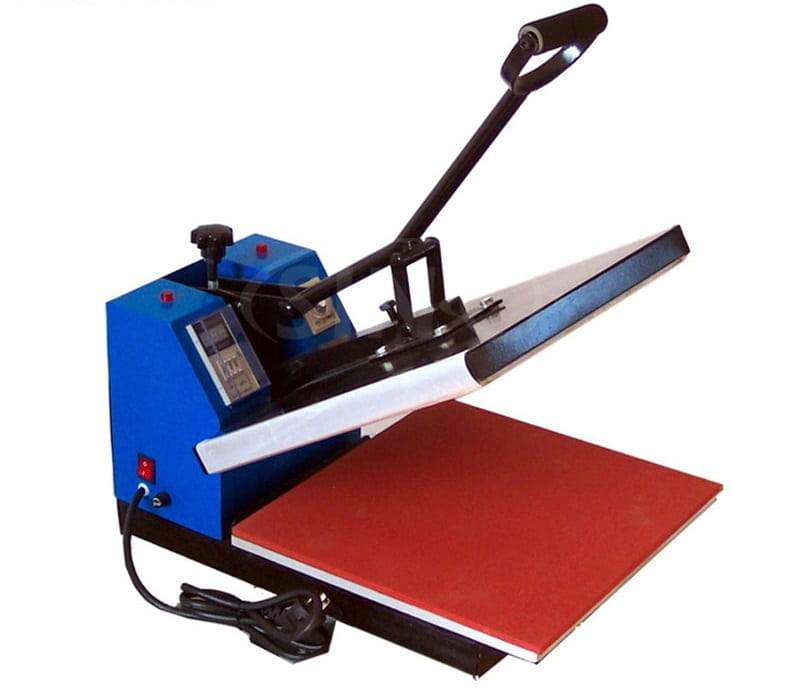
How To Use The Heat Press Machine

Steps:
1. Plug in the power, turn on the power switch, and the power indicator will light;
2. Set the thermostat to the desired temperature. After the temperature reaches the set temperature, the indication on the top of the thermostat extinguishes and operation can be started.
3. Set the timer to the desired time;
4. Lay the garment on the bottom ironing board, then place the heat transfer paper (look at the front and back of the heat transfer paper) and press the handle down firmly to the end point. Note: Do not use more than 30 kg of force, otherwise the handle may be deformed;
5. When the time controller indicating the hot stamping time expires, the buzzer sounds, that is, the handle is raised to the original position.

How to use the heat press machine

Precautions:
1. Pressure: If the pressure is not enough or too large, please adjust the pressure knob after the machine to increase the pressure clockwise; otherwise, reduce the pressure;
2. Time: when the hot stamping time comes and the buzzer does not ring or keeps ringing, if it is not suitable, it must be adjusted to the appropriate position;
3. Temperature: When the set temperature is reached, the pointer of the temperature controller points to the “180 ° C” position (approximately 5 minutes). If the ignition thermometer rises and the heating plate does not heat up, check the circuit.

How to use the heat press machine

4. When the handle is pressed down, the hand is released and the handle lifts up automatically. Adjust the adjustment knob down.
5. When the hot stamping is complete and the handle lifts up and feels difficult, adjust the adjustment knob down.

Six Ways To Straighten Hair Without Straighteners

Although it is undoubtedly the time for waves and texture in the hair, straightening hair is still a must for many, either daily or for specific occasions. Women with curly, wavy or just plain dull hair have an infallible ally in straightening irons to control the frizz of their hair and change their “look”, from curly to straight, whenever they feel like it.

Although irons are the most effective method to achieve flawless straightening, we all know the long-term effects that continued use of this tool can have on the hair. That is why we have proposed to find other alternatives to control frizz and straighten hair at home.

Straighten Hair Without Irons And Without Heat

From the most traditional (and effective) solutions to the most creative, these ideas will allow us to take a break from straightening irons from time to time:

“Toga”

The traditional alternative to heat straightening tools is popularly known as a “toga.” Generally speaking, it is a straightening method that consists of wrapping the entire mane around the head. It can be done on both wet and dry hair.

Thus, after washing and detangling it, we can leave it slightly damp to wrap it around the head, either strand by strand (holding them with hairpins) or with the entire mane in one section. In case we use hairpins, it is best to opt for those that mark the hair as little as possible (such as those of the models). If we want to avoid the use of hairpins (especially to avoid discomfort when lying down), we can resort to a hairnet and/or a handkerchief.

In addition, with a comb or a natural bristle brush we will help ourselves to collect all the hair until it is well polished. Otherwise, it will be marked once we undo the “toga.”

It is an ideal method to perform at night and take advantage of the hours of sleep to achieve that ideal straightening.

Curlers

Another option for cold straightening your hair is to use giant rollers. Only if they are large will we achieve the smoothed effect. Otherwise, if we use small curlers, we will get kinky hair.

To straighten hair with large rollers we must have wet hair (after washing it, remove excess moisture with the towel) and let it dry without undoing the rollers. We will hold the sections of hair with the help of hairpins regardless of whether we wind the hair inward or outward.

Straightening Brush

This hot styling tool became quite a find upon its launch a few years ago. It is an electric brush with heat that smoothes the hair by combing it section by section. The result is not as polished as that obtained with the irons, although the straightening brush is not as aggressive on the hair.

With Dryer

Wavy and coarse hair can be effectively straightened without much fuss with the only help of a blow dryer and a brush. You don’t even need to use a styling brush to control frizz and leave a smooth finish. It is enough to dry the hair bypassing the brush through the entire mane until it dries completely.

We can apply a serum or hair oil on the tips to achieve a better result and give shine. The result will not be comparable to that of the irons, but we will obtain a natural straightening in less time and without attacking our hair so much. For this, it is also important to use the dryer at a medium temperature.

With Rubbers

A homemade trick to straighten hair without irons or heat is to gather the hair to the side with wide fabric scrunchies or elastic headbands so that it is covered over its entire surface. The idea is to have a stiff ponytail without spaces where the hair can be seen to achieve that soothing effect. To get the hair to take shape, the idea is to dampen it slightly or, if it has just been washed, partially dry it with the dryer.

Straightening with Treatment

In addition to the tools and tricks, we can use specific products and treatments for straightening similar to those used in beauty salons but applied at home. They are keratin-based treatments that achieve smoothing effects in the short and medium-term and are ideal for very frizzy hair.

Although this type of treatment, among which is known as Brazilian straightening, provides a long-lasting straightening that allows you to do without the plates for a season, it is generally necessary to use heat tools (dryer or plates) to apply them.

How To Clean Your Printer Cartridges In Minutes?

If your printer is experiencing glitches – such as blank spots, resolution issues, poor definition, and even paper jams – the ink cartridges are likely to blame. Don’t worry! We are not referring to the quality of the product -which, for sure, is the best- but to its state of conservation. And is that inkjet printing can be affected by failures in the heads and nozzles.

Fortunately, this minor issue is easily resolved. You will only need to get rid of the ink residues that have accumulated on each of the pieces and you will once again enjoy a printing that is as reliable as the first day.

How to clean the printer cartridges step by step

This Ntt-toner guide will help you with any make and model of printer that uses dye or pigment ink cartridges.

Step 1. Examine the injectors

Most printers have a maintenance tool. To find it, access the printer menu or go to the device section of your computer. Click on “maintenance” and select the “nozzle check” option. Many users prefer to check the nozzles after performing manual and automatic ink cartridge cleaning, but this is a mistake. It is preferable to do it earlier so that the printer software can recognize if there are printing problems.

Step 2. Automatic head cleaning

If the injectors are clogged, the system will recommend cleaning the heads automatically. In this scenario, the program will send a series of instructions to the computer to print some designs with different levels of ink.

In most cases, automatic factory cleaning solves printing problems. Therefore, once the maintenance is finished, click on “test page print” and verify that the print quality is as desired.

If your computer has improved but is unable to achieve optimal resolution and definition, it’s time for a manual cleaning!

Step 3. Manually cleaning the ink cartridges

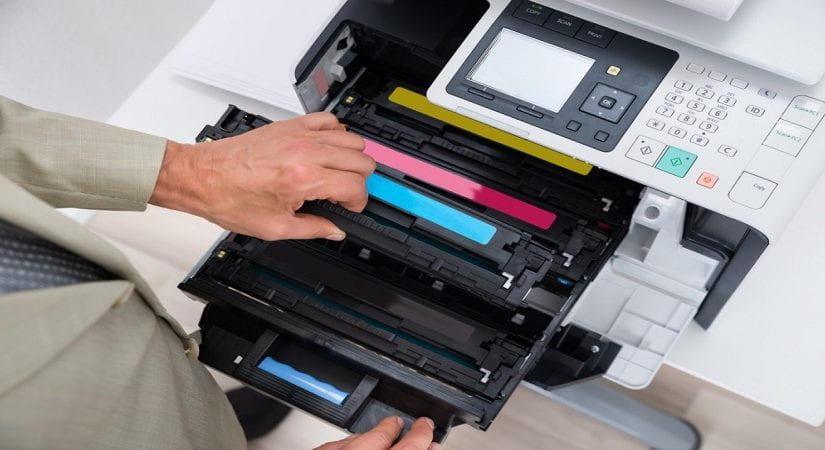
Locate the ink cartridge installation slot on your computer and remove each unit. Find a soft cloth that is clean – and does not shed fibers – and moisten it with water. It is important that the water is warm, as this will facilitate the loosening of the dried ink that is clogging the head. Press the head of each cartridge onto the cloth until you notice that it begins to stain with ink. Dip the cloth back into the warm water and gently rub the head.

To make sure you have removed all the dirt, take a paper towel and do a little test. A completely clean ink cartridge will leave a uniform stain on the paper, probably one for each color chamber. Repeat the procedure with all the cartridges in your printer and install them again.

Step 4. Cleaning the print rollers

Take advantage of this in-depth maintenance to clean the printer’s rollers. You can easily recognize them when you open the lid of the equipment because they are two -or more- small pieces 1-2 cm wide. Dampen a clean cloth – the same as the one you used to clean the ink cartridges – in warm water and rub the rollers gently.

Remember to rotate the pieces to remove all the ink and any particles that are obstructing the print. If you can’t find the rollers for your printer, check the manual or download it directly from the manufacturer’s website.

Step 5. Turn on the printer and print a test page

Once everything is clean and dry, turn on the machine and print a test page. You will notice that the printing has an optimal level and without errors; just like when you bought the printer. If it still has errors, run automatic maintenance again, select the “ink cartridge alignment” option, and print another test page. This will ensure you have the printer ready for your next project.

How To Repair Your Printer At Home

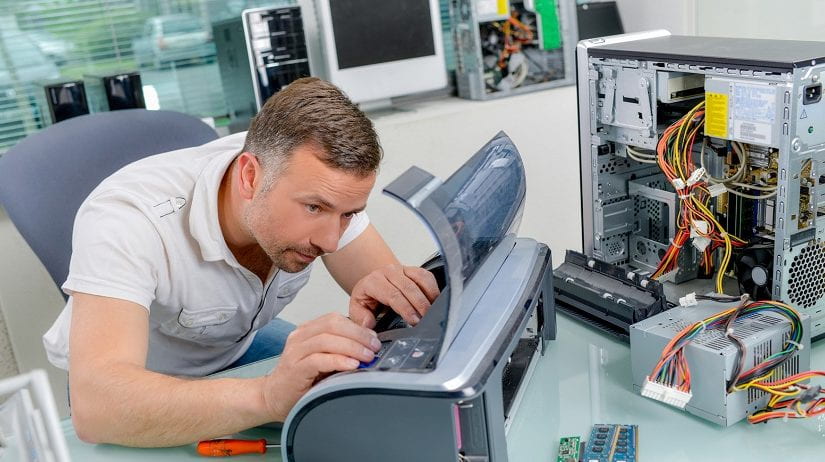
In the office and home, the printer is a very important device that we use frequently and that due to its great use presents failures that in most cases are easy to solve and it is not necessary to take it to the technical service to repair it.

There is a varied catalog of printer brands, all obviously with their pros and cons, Epson, HP, Brother, Canon, Samsung, etc. The influence of maracas such as Epson and Hp is significant and for this reason, we select important video tutorials for you to solve common problems of the most popular ink printers on the market.

Although they are not so common, there are still many printers that handle cartridges that contain the ink to make the prints. The following tutorial shows how to do an effective repair when the cartridges are dry.

On many occasions, you have asked yourself: What do I do if the printer does not work? Most of those answers are in this video and they can help a lot in solving the problems that your printing machine presents.

If your printer fails at the time of printing, it is most likely that it has clogged heads due to the accumulation of ink or dust. Learn how to fix this problem on an Epson L355.

If you are thinking of buying a new printer because the one you have stopped working? Think twice, a good solution, if you have a printer of the Epson brand in its well-known reference L is to do a reset to make it like new. The process is not complicated, you just have to be a little careful when you are doing it.

For best practices in HP printer troubleshooting is your excellent technical support channel. The videos are narrated in English but have subtitles in Spanish, the explanation is very didactic and easy to understand thanks to the good handling of images.